Authentication
Windmill provides flexible authentication options to ensure secure access to the platform. Users can authenticate through Single Sign-On (SSO) with a restricted domain or with a simple e-mail if added manually by superadmins.
Restricted Domain Authentication
Windmill supports authentication through SSO for users with email addresses from a restricted domain. This allows organizations to control access to Windmill based on their domain policy. Users with email addresses from the authorized domain can authenticate seamlessly using their SSO credentials.
To enable restricted domain authentication, an administrator can configure the authorized domain in the OAuth configuration by setting 'allowed_domains' to the desired domains (e.g: 'windmill.dev' to accept only Google/Microsoft logins with a xxx@windmill.dev address). Once configured, users with email addresses from the authorized domain will be able to log in using their SSO provider.
Manually Add Users to a Windmill Instance
As a superadmin of the instance, you have the ability to manually add users to the Windmill instance. This is useful for inviting users who do not have SSO credentials or for providing access to individuals outside the restricted domain.
To manually add users:
- Log in to the Windmill instance as a superadmin.
- Click on your username and pick Instance settings.
- Fill:
- Email: The email address of the user.
- Password: A password for the user's account.
- Name (Optional): The name of the user.
- Company (Optional): The company or organization the user belongs to.
- "Add user to instance".
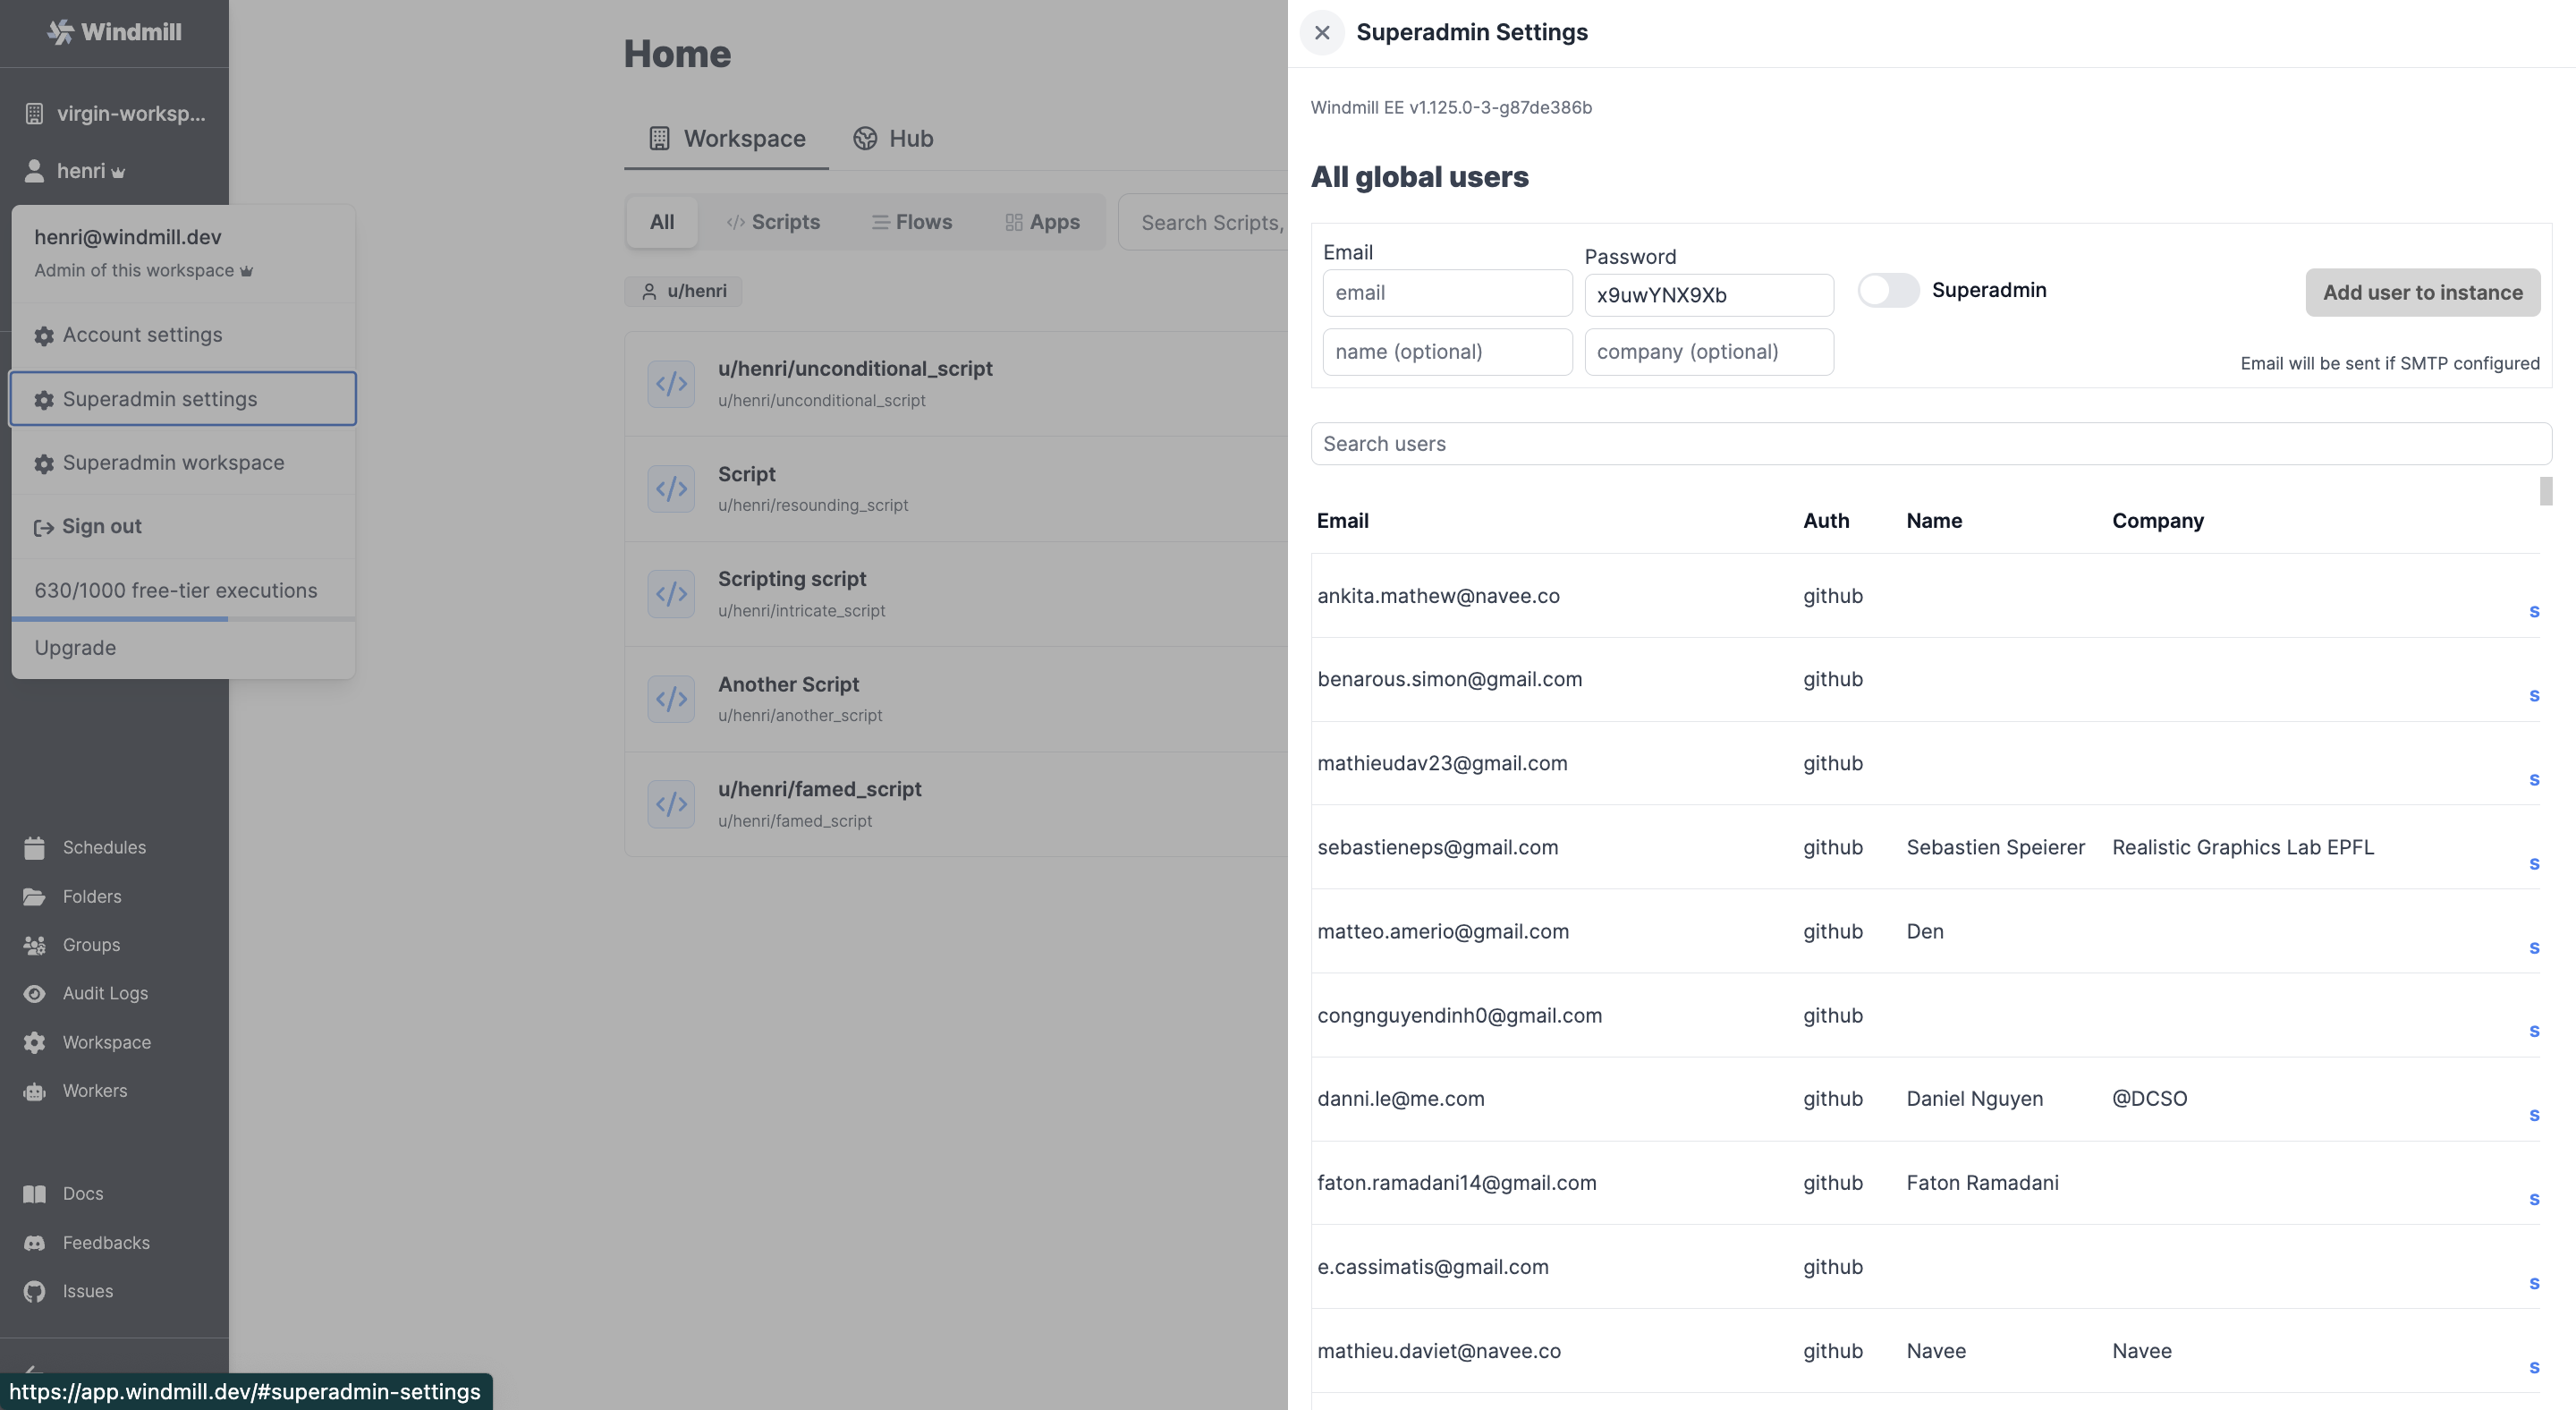
If SMTP is configured, an email will be sent to the user with their account details and instructions for accessing Windmill.
By default, users are not invited to any workspace, unless auto-invite has been set-up.
Adding Users to a Workspace
Once added to an instance, users can create their own workspace. However, by default they will not be invited to any workspace.
Windmill can be configured to remove the ability for non-superadmins to create workspace using the: CREATE_WORKSPACE_REQUIRE_SUPERADMIN env variable.
Manually
From the Workspace settings, in the Users & Invites tab, any admin can manually add users, filling:
email: the email address linked to the Windmill account.user: the username (specific to workspace).
Users can be given roles Operator, Developer or Admin. Any user can also be manually removed.
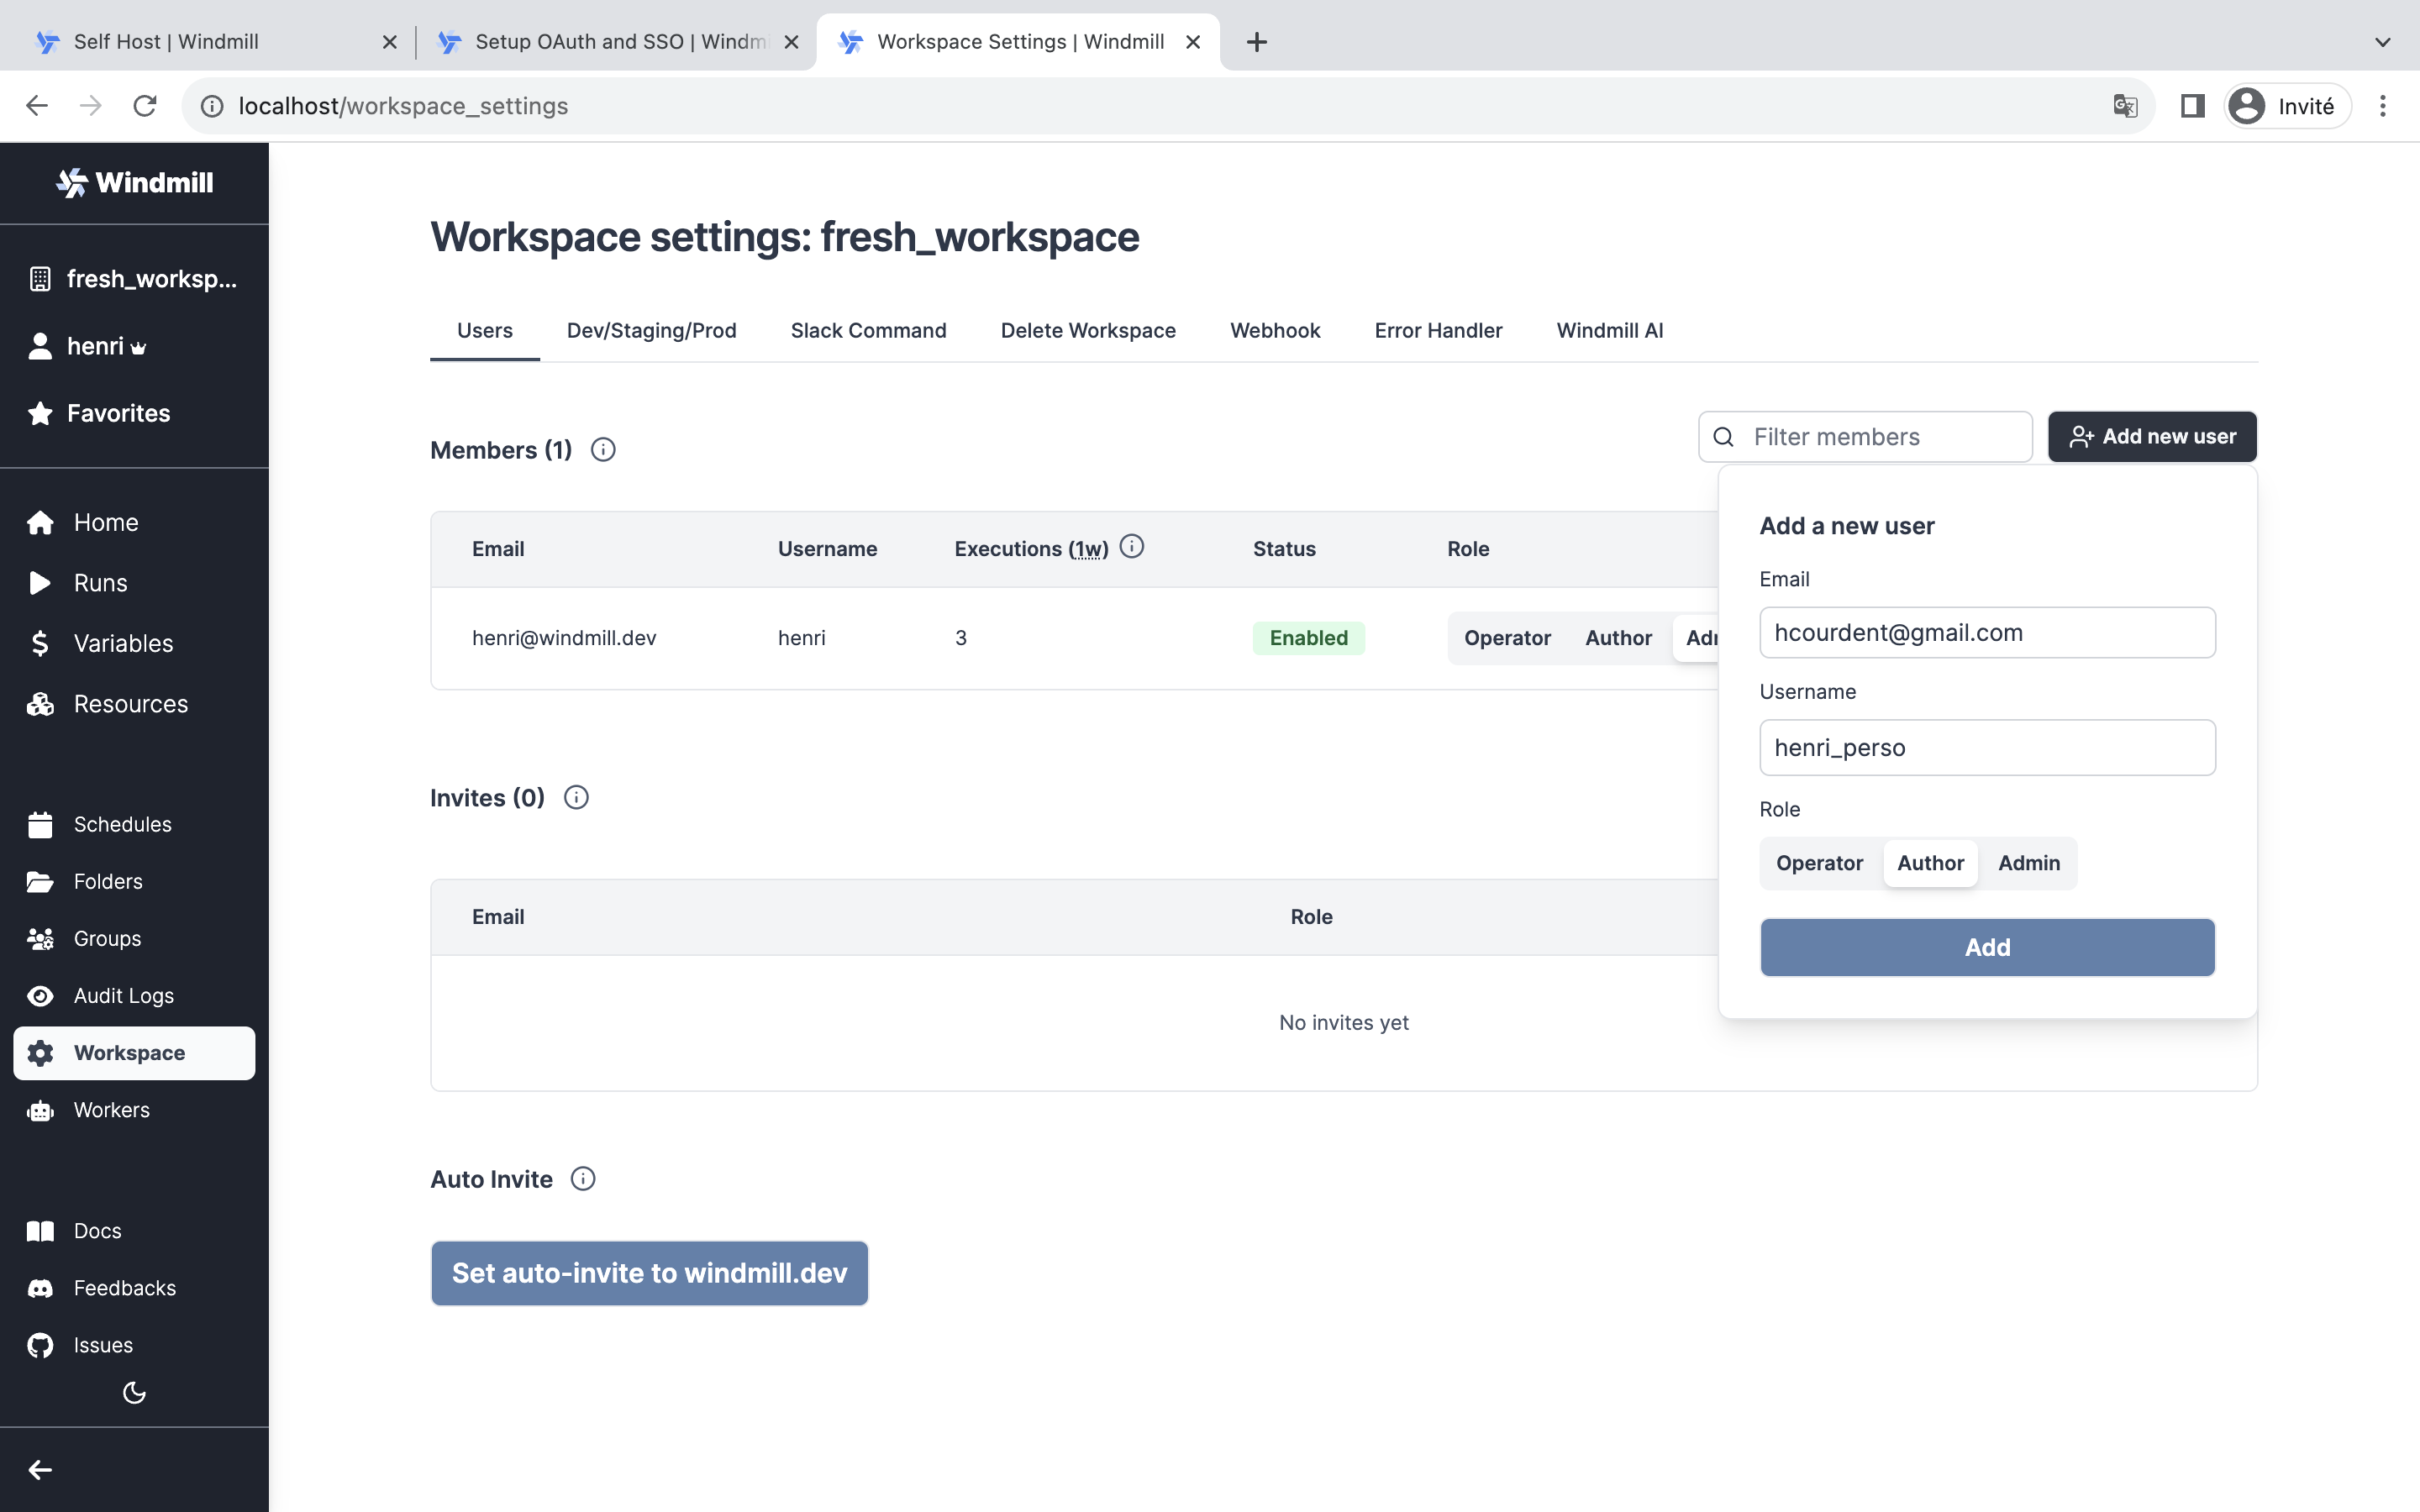
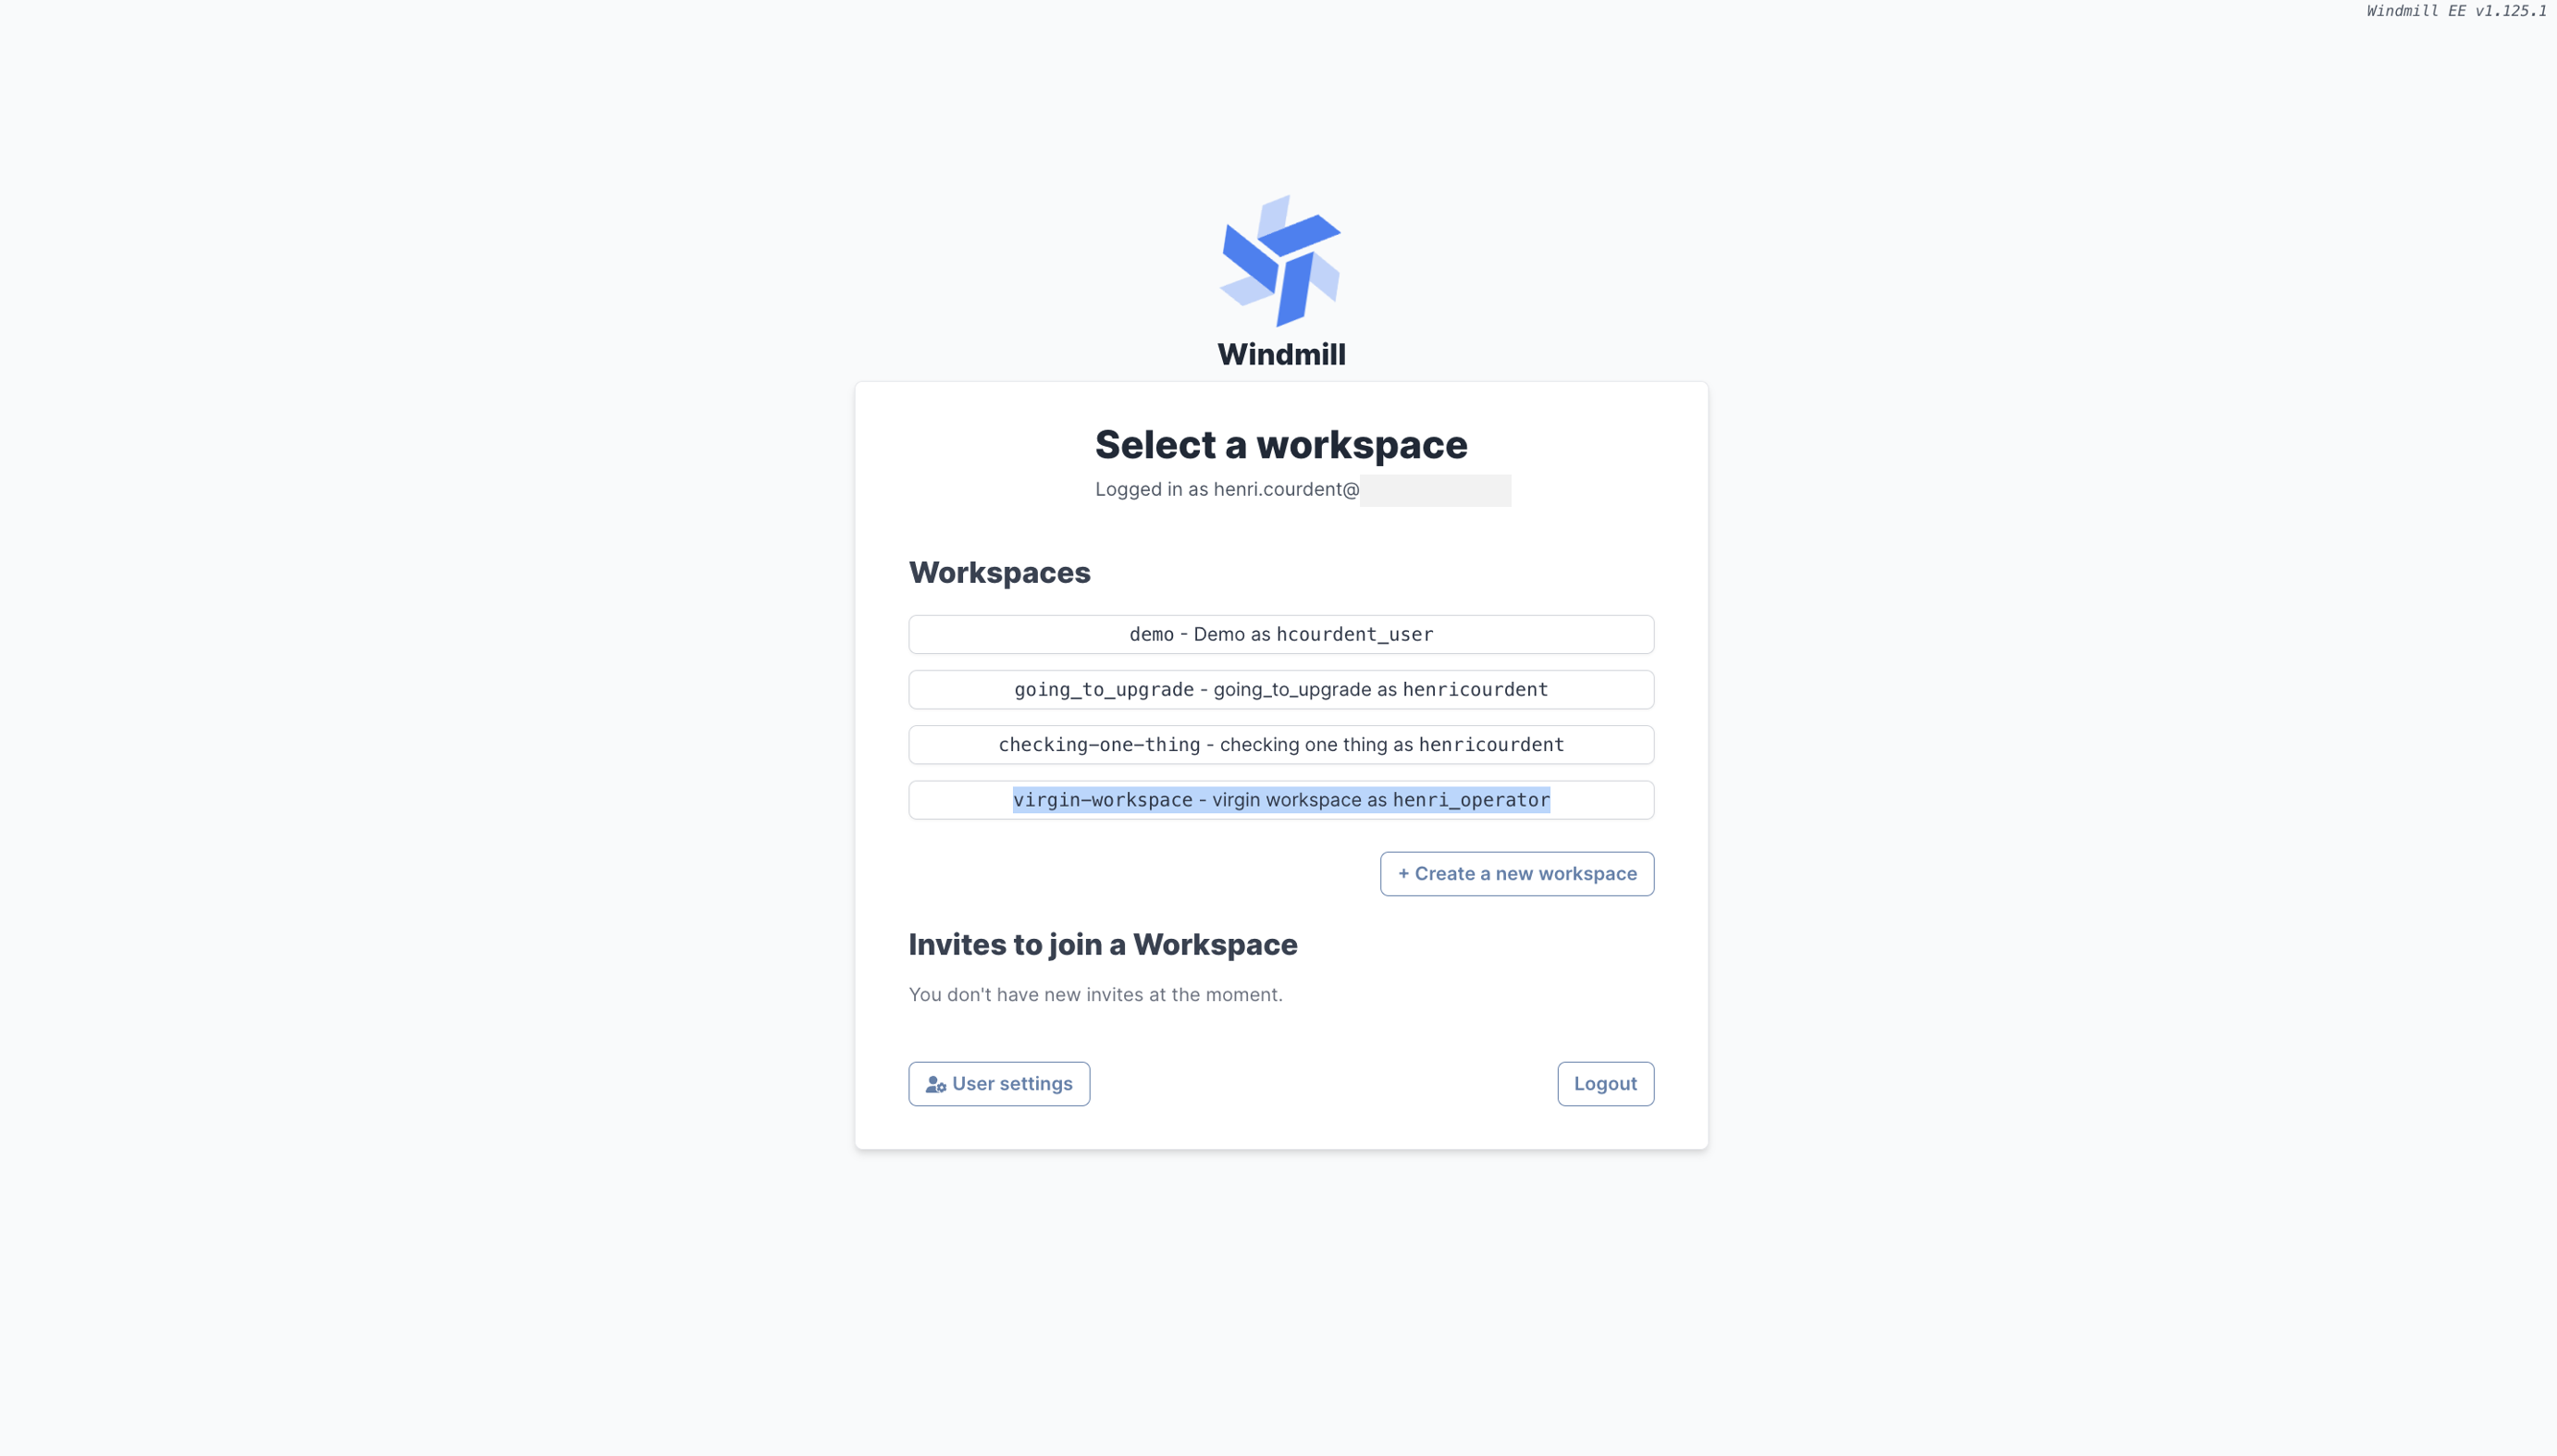
The user will be added to the workspace even if no Windmill account is created yet. Once access is created to a Windmill account, the workspace will be available from the "Select a workspace" menu.
You can also choose to invite users instead of adding them directly. You only need to fill in the users' email and they will have to pick the username.
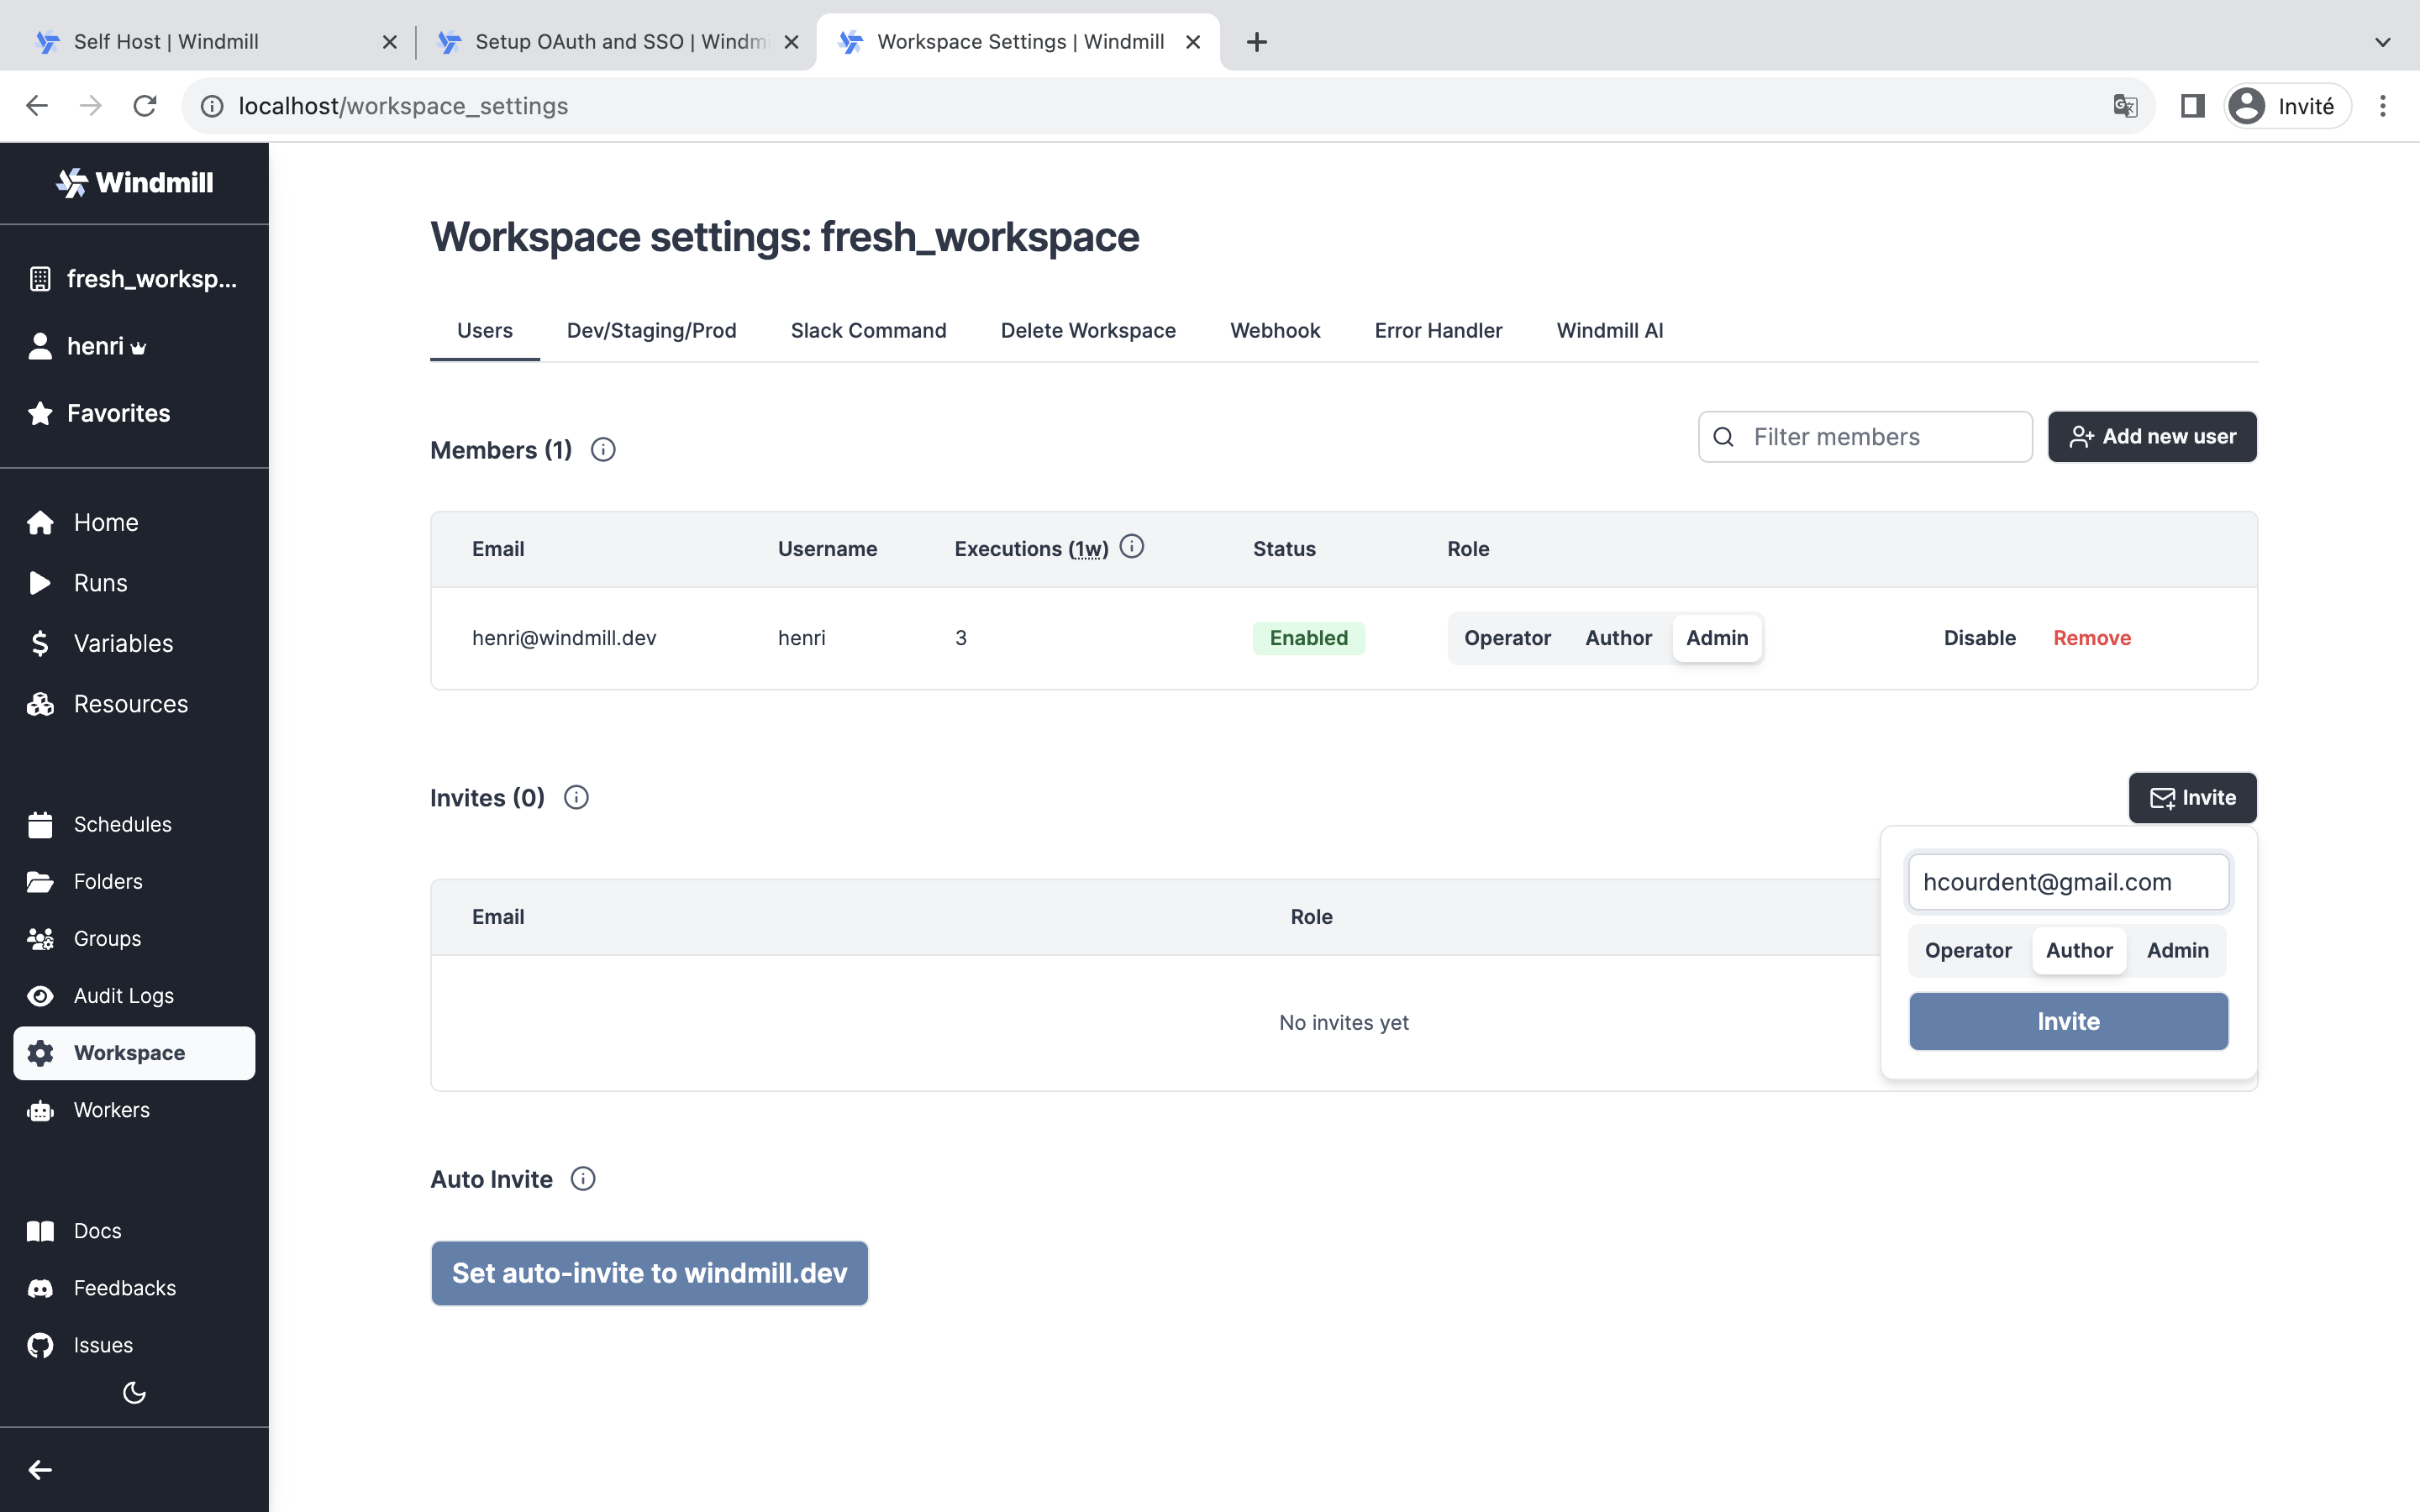
Add the user's email to the list of invites, with the appropriate level of permission.
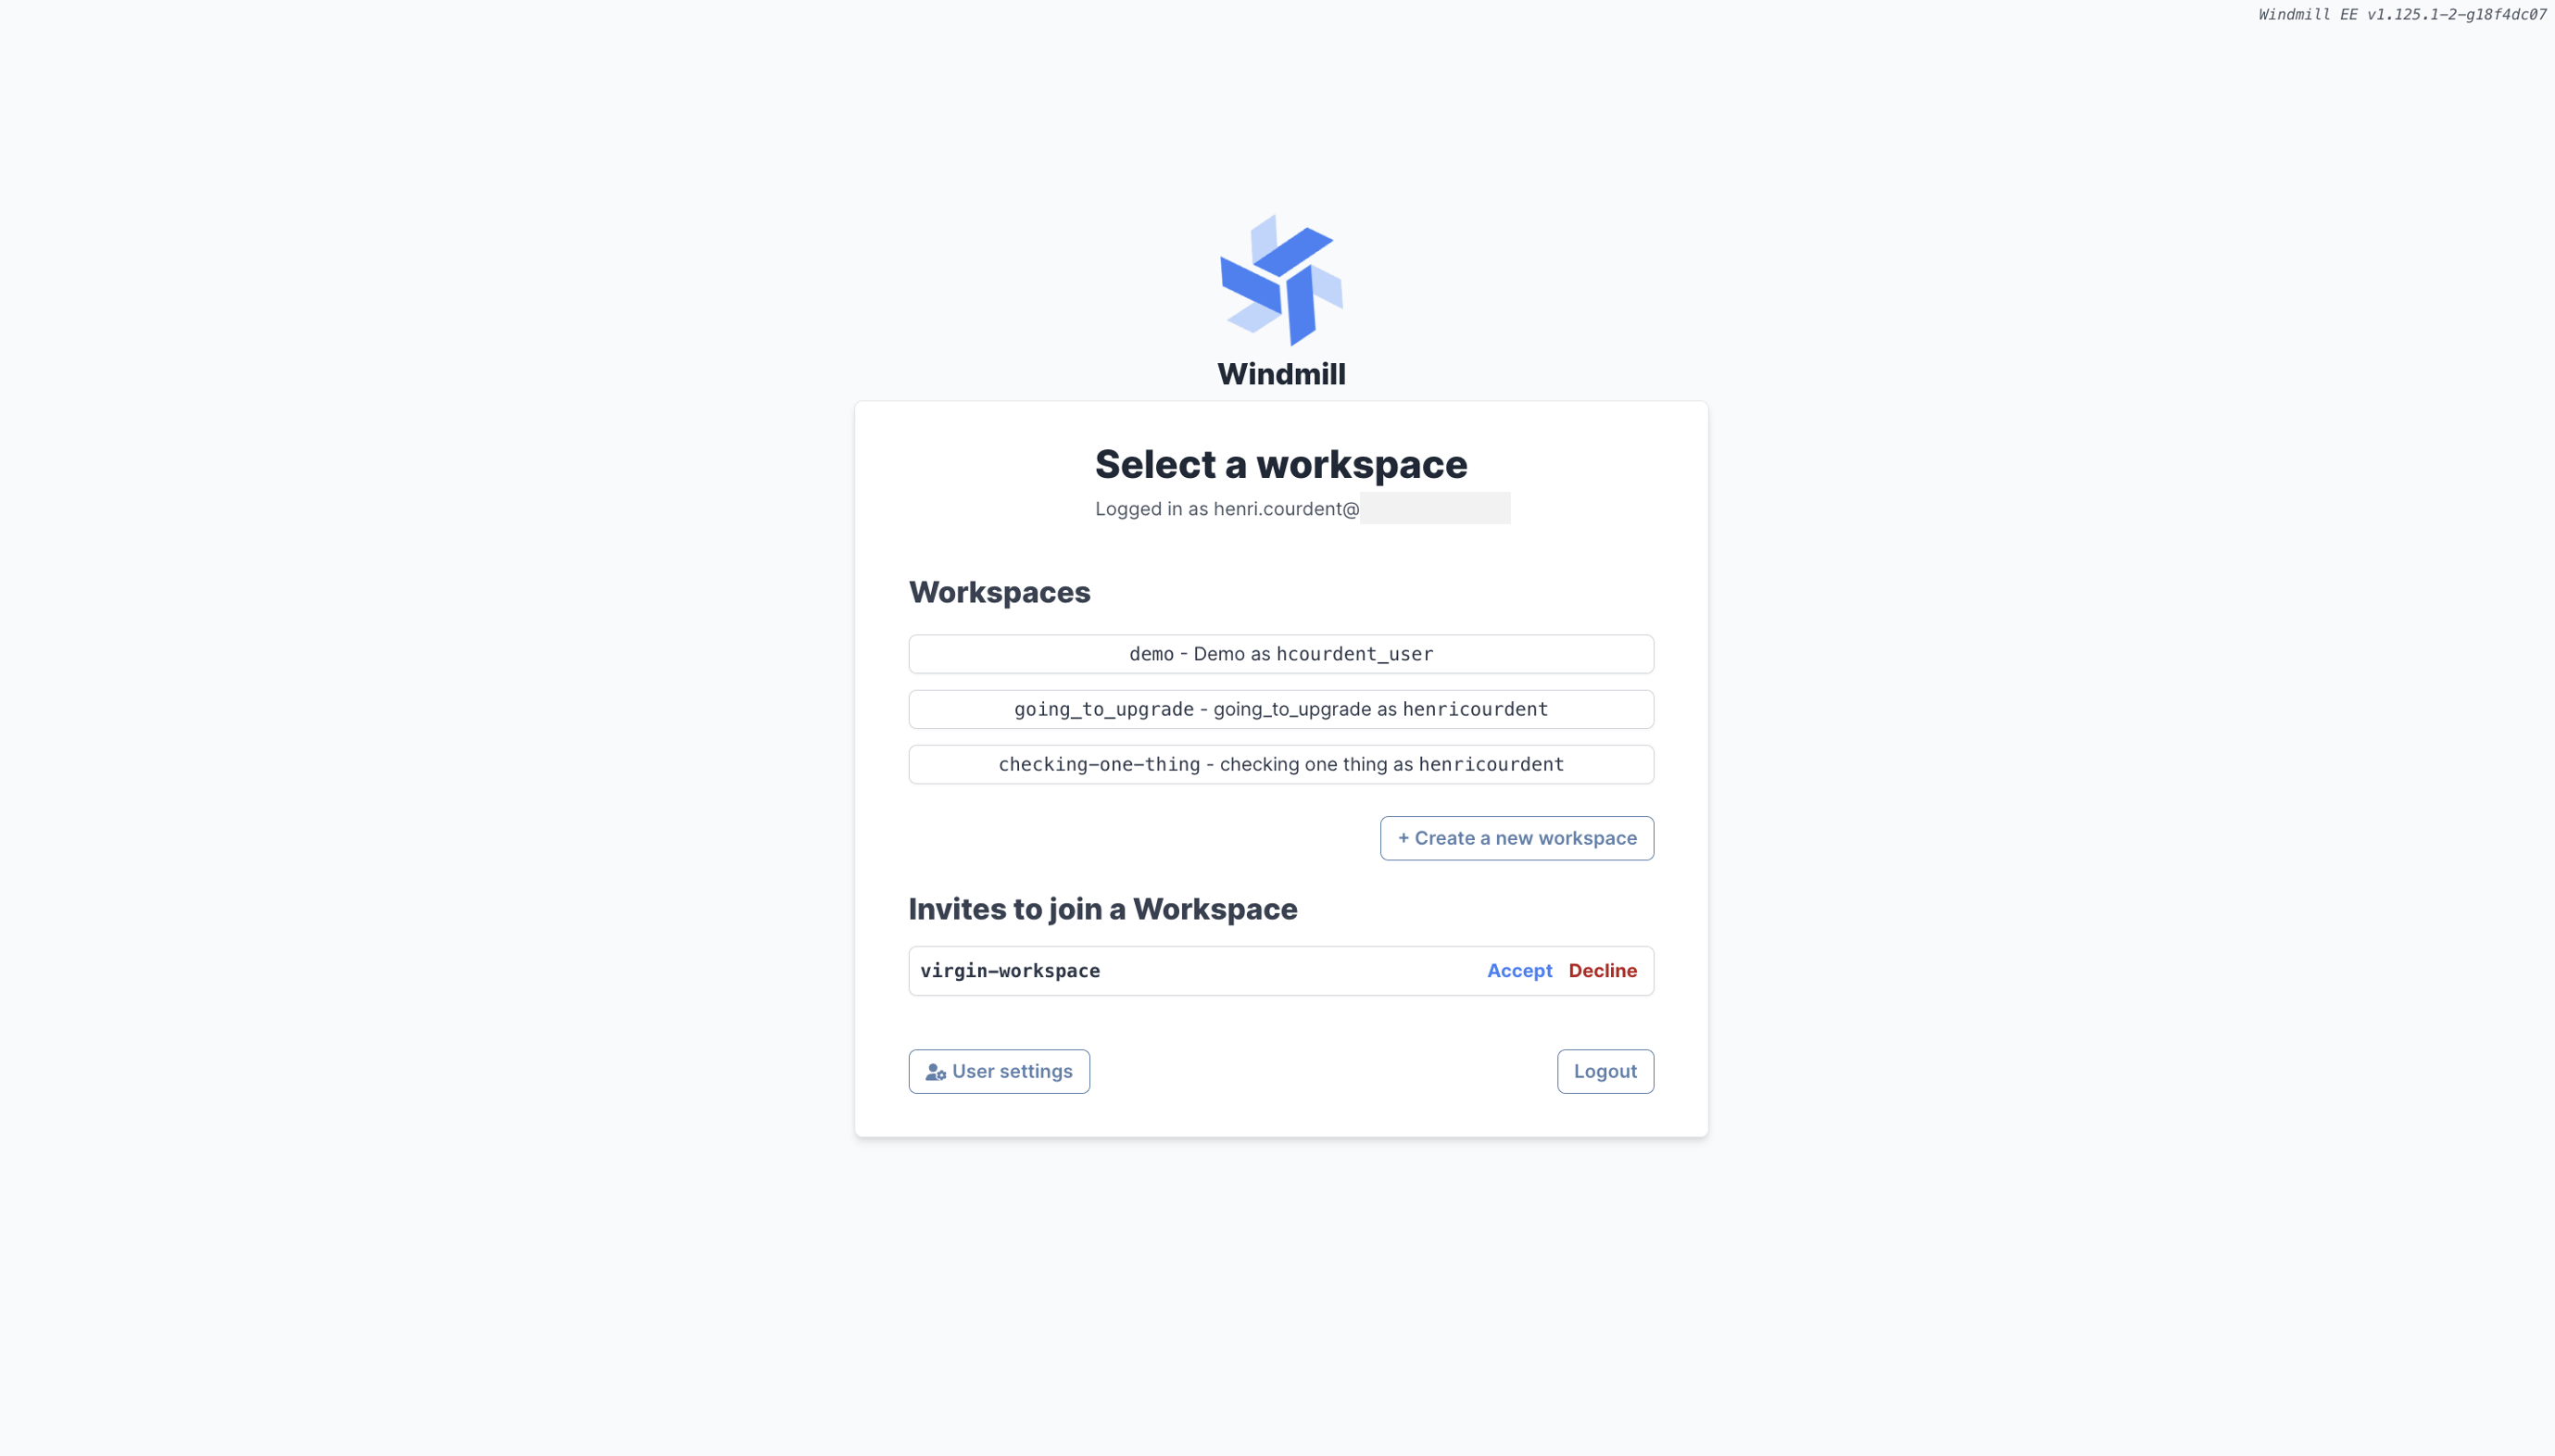
The invite will be available in the "Invites to join a Workspace" section.
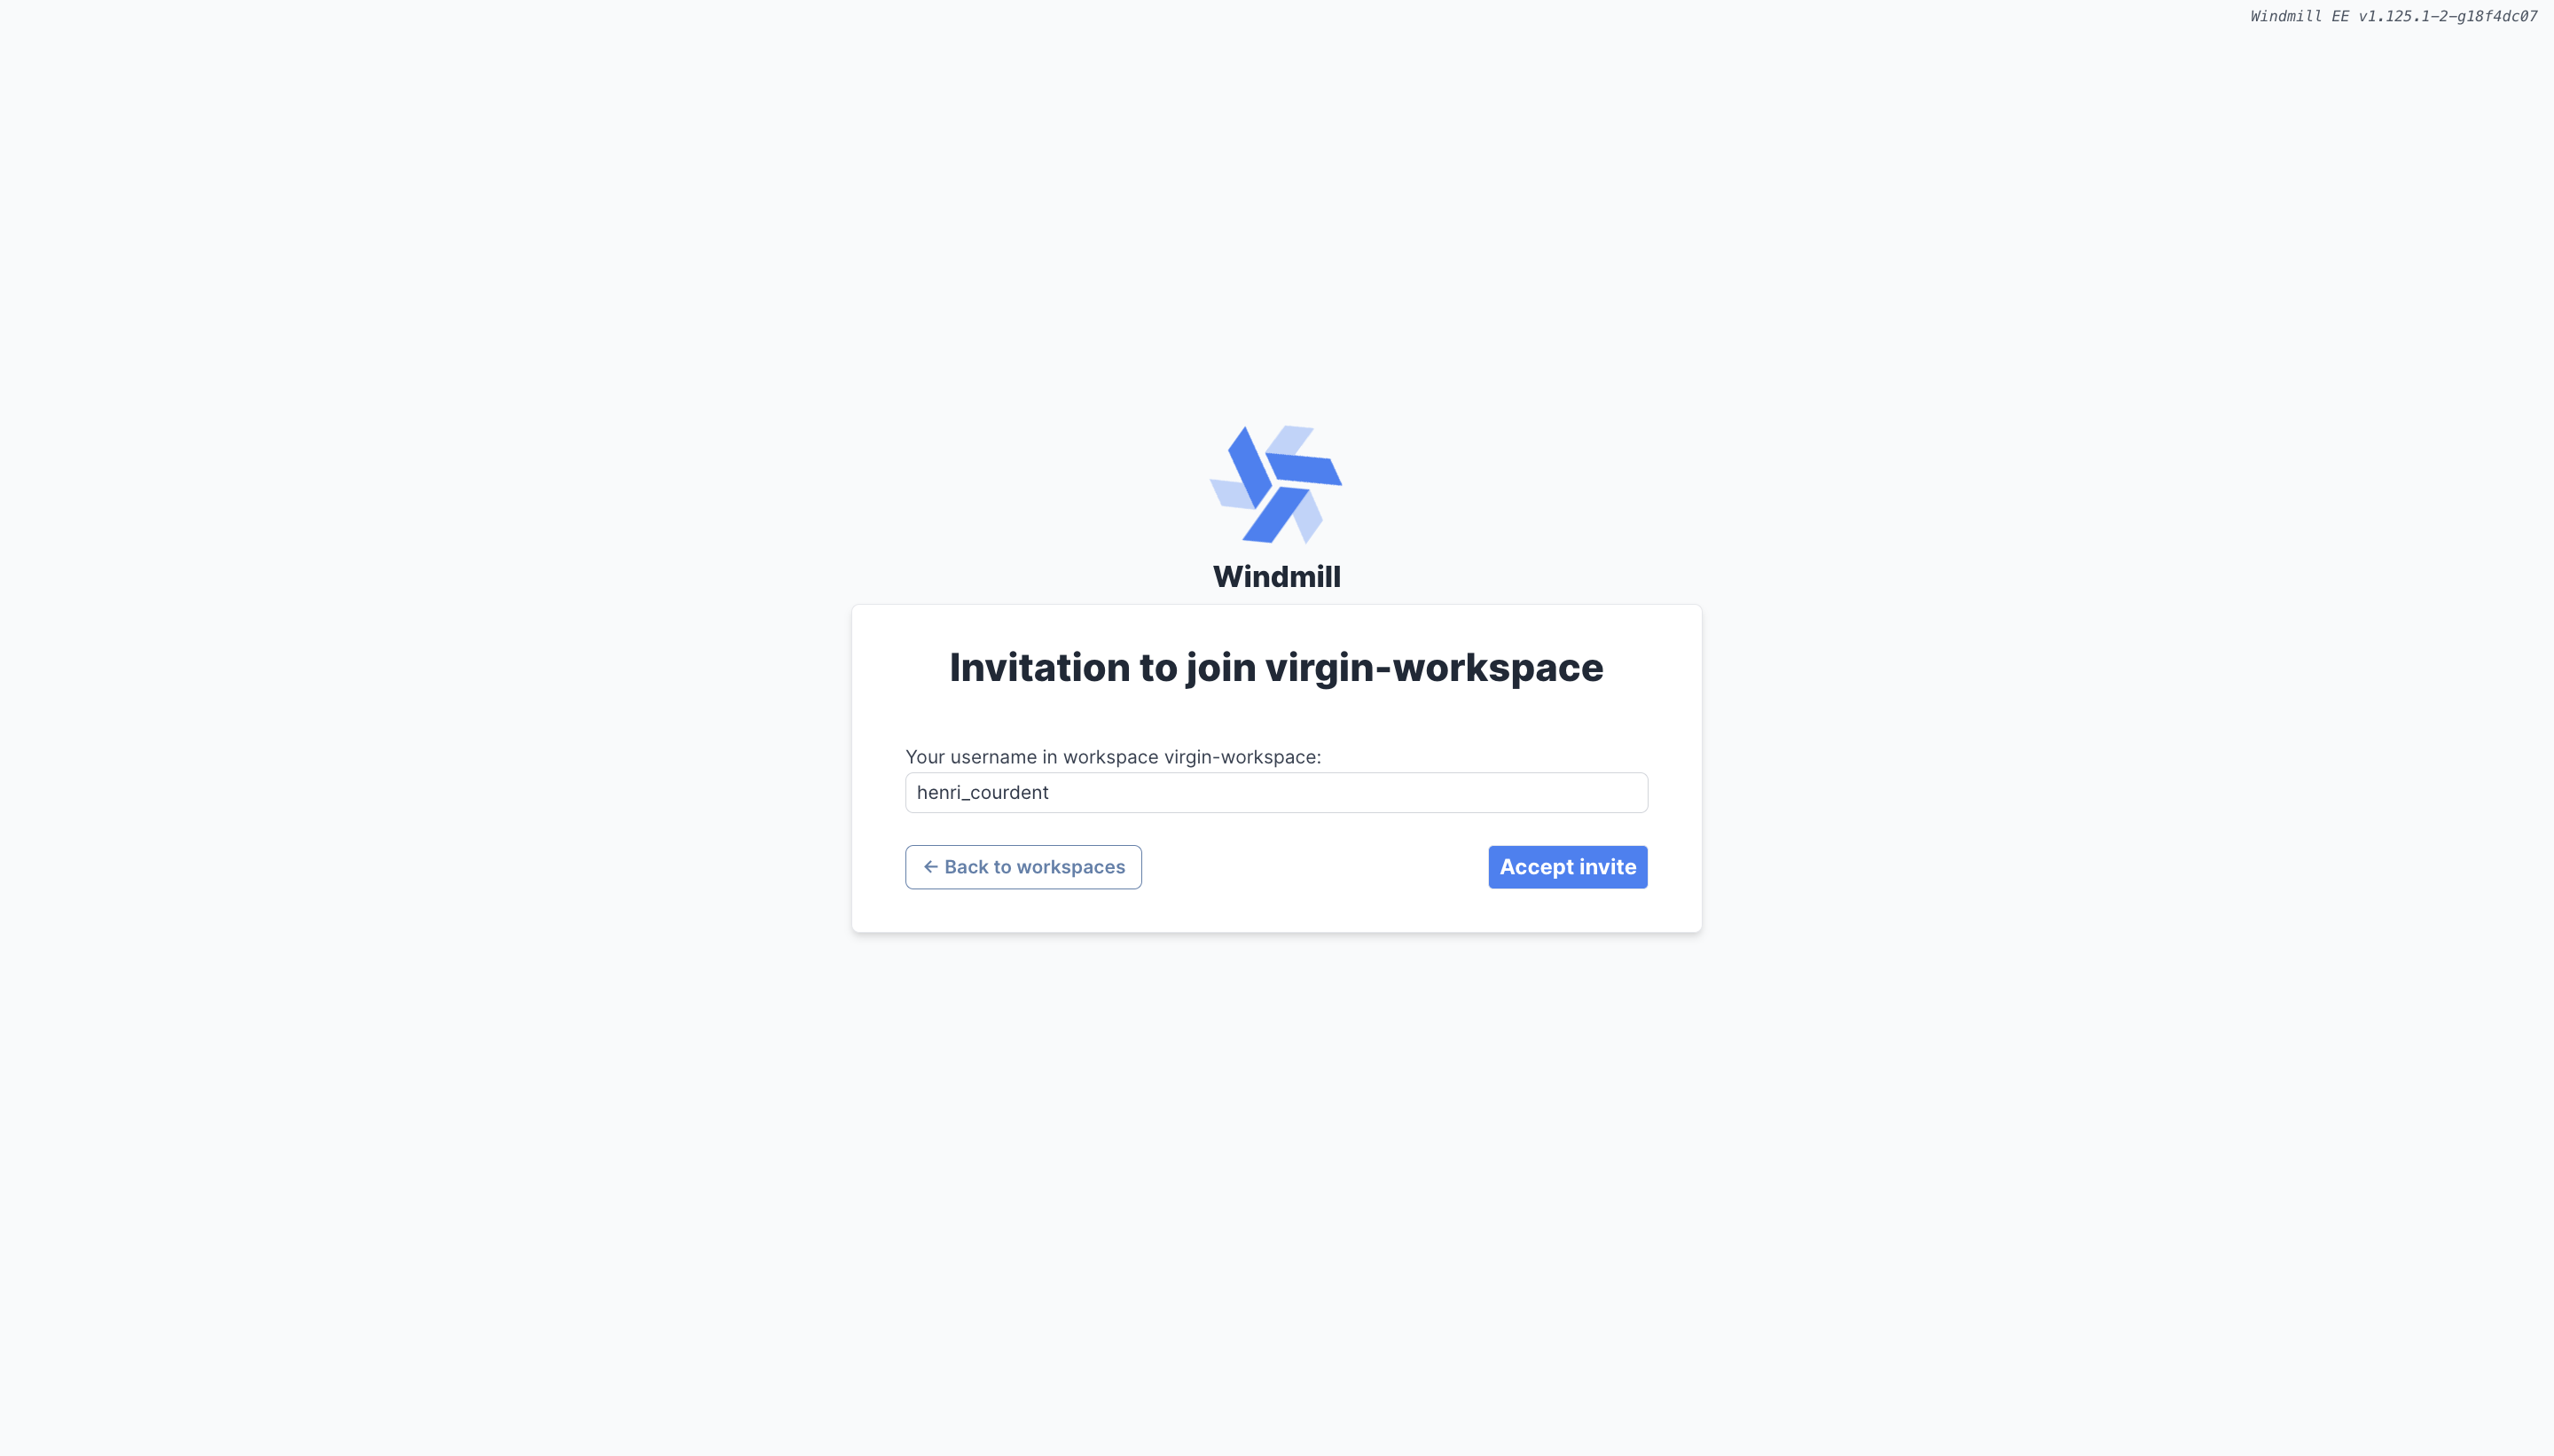
From where the users can set their username.
If SMTP is configured, the invite will be sent even if no Windmill account is created yet. Once access is created to a Windmill account, an invite will be available from the "Select a workspace" menu.
Auto Invite
You can send auto-invites to the workspace to users from your domain.
From the Workspace settings, in the Users & Invites tab, go to "Set auto-invite to [domain]".
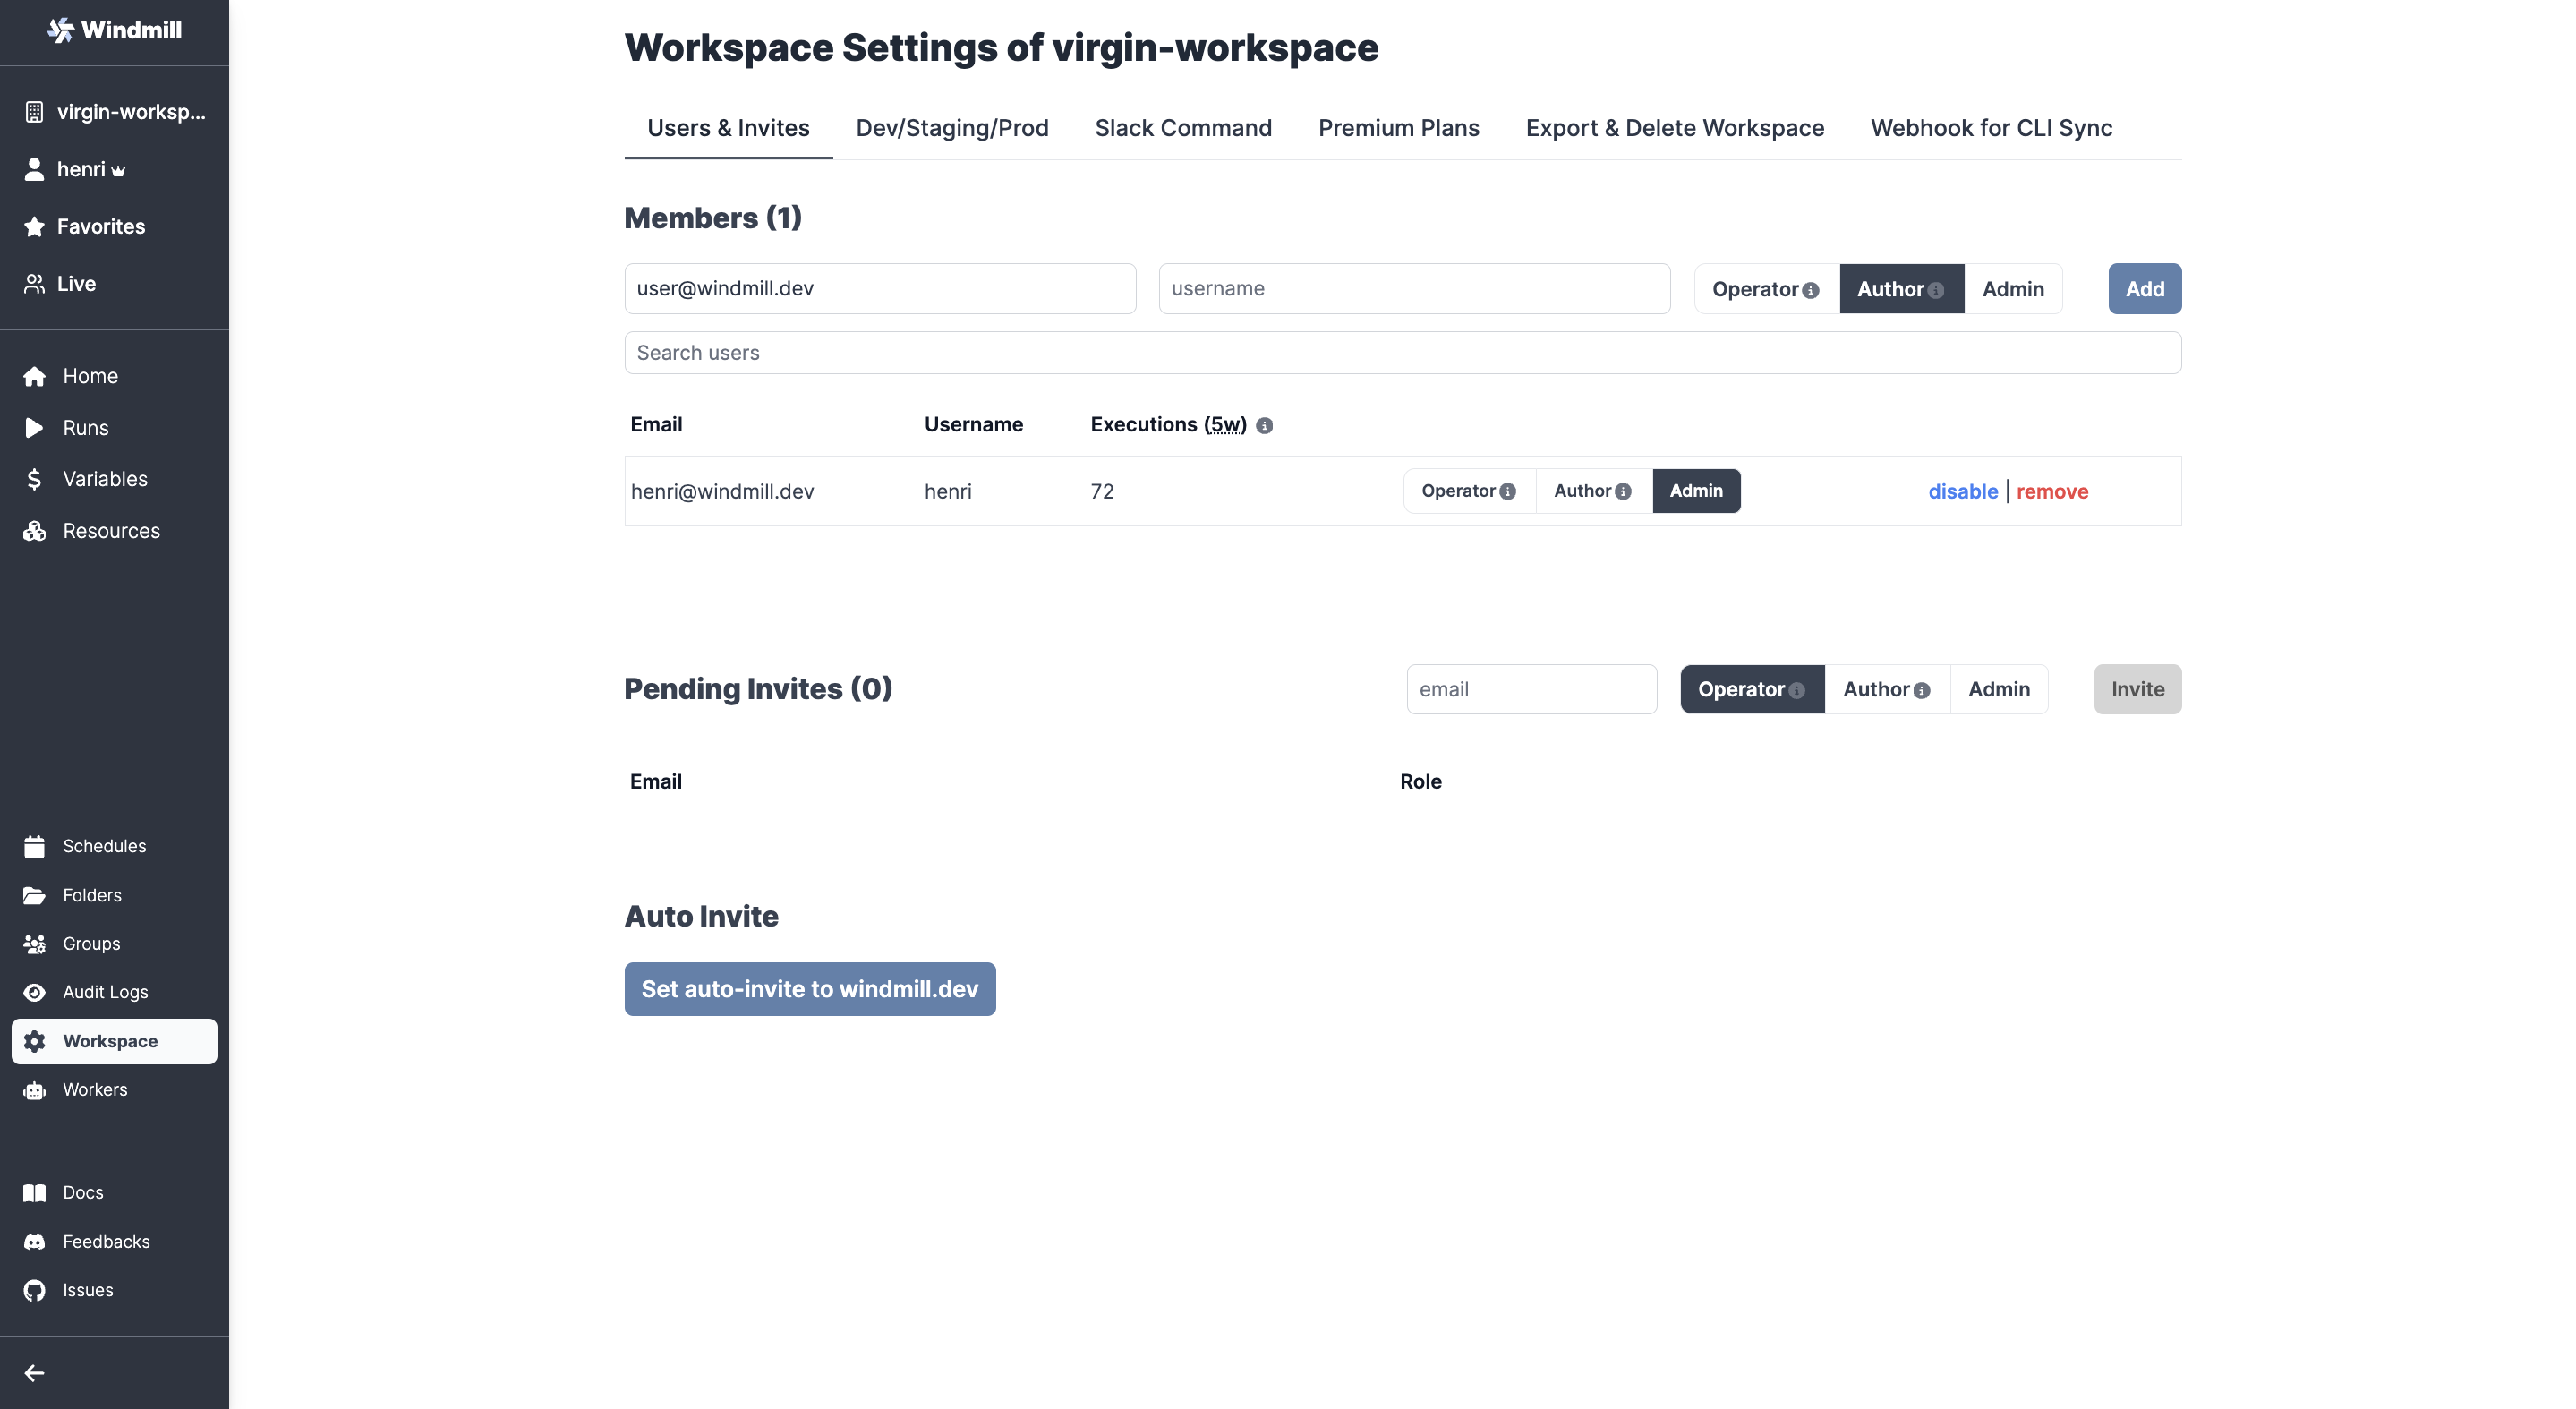
This will add users to the list of Pending Invites, from where you can still manually cancel any invite.
At last, you can enable "Auto-invited users to join as operators".
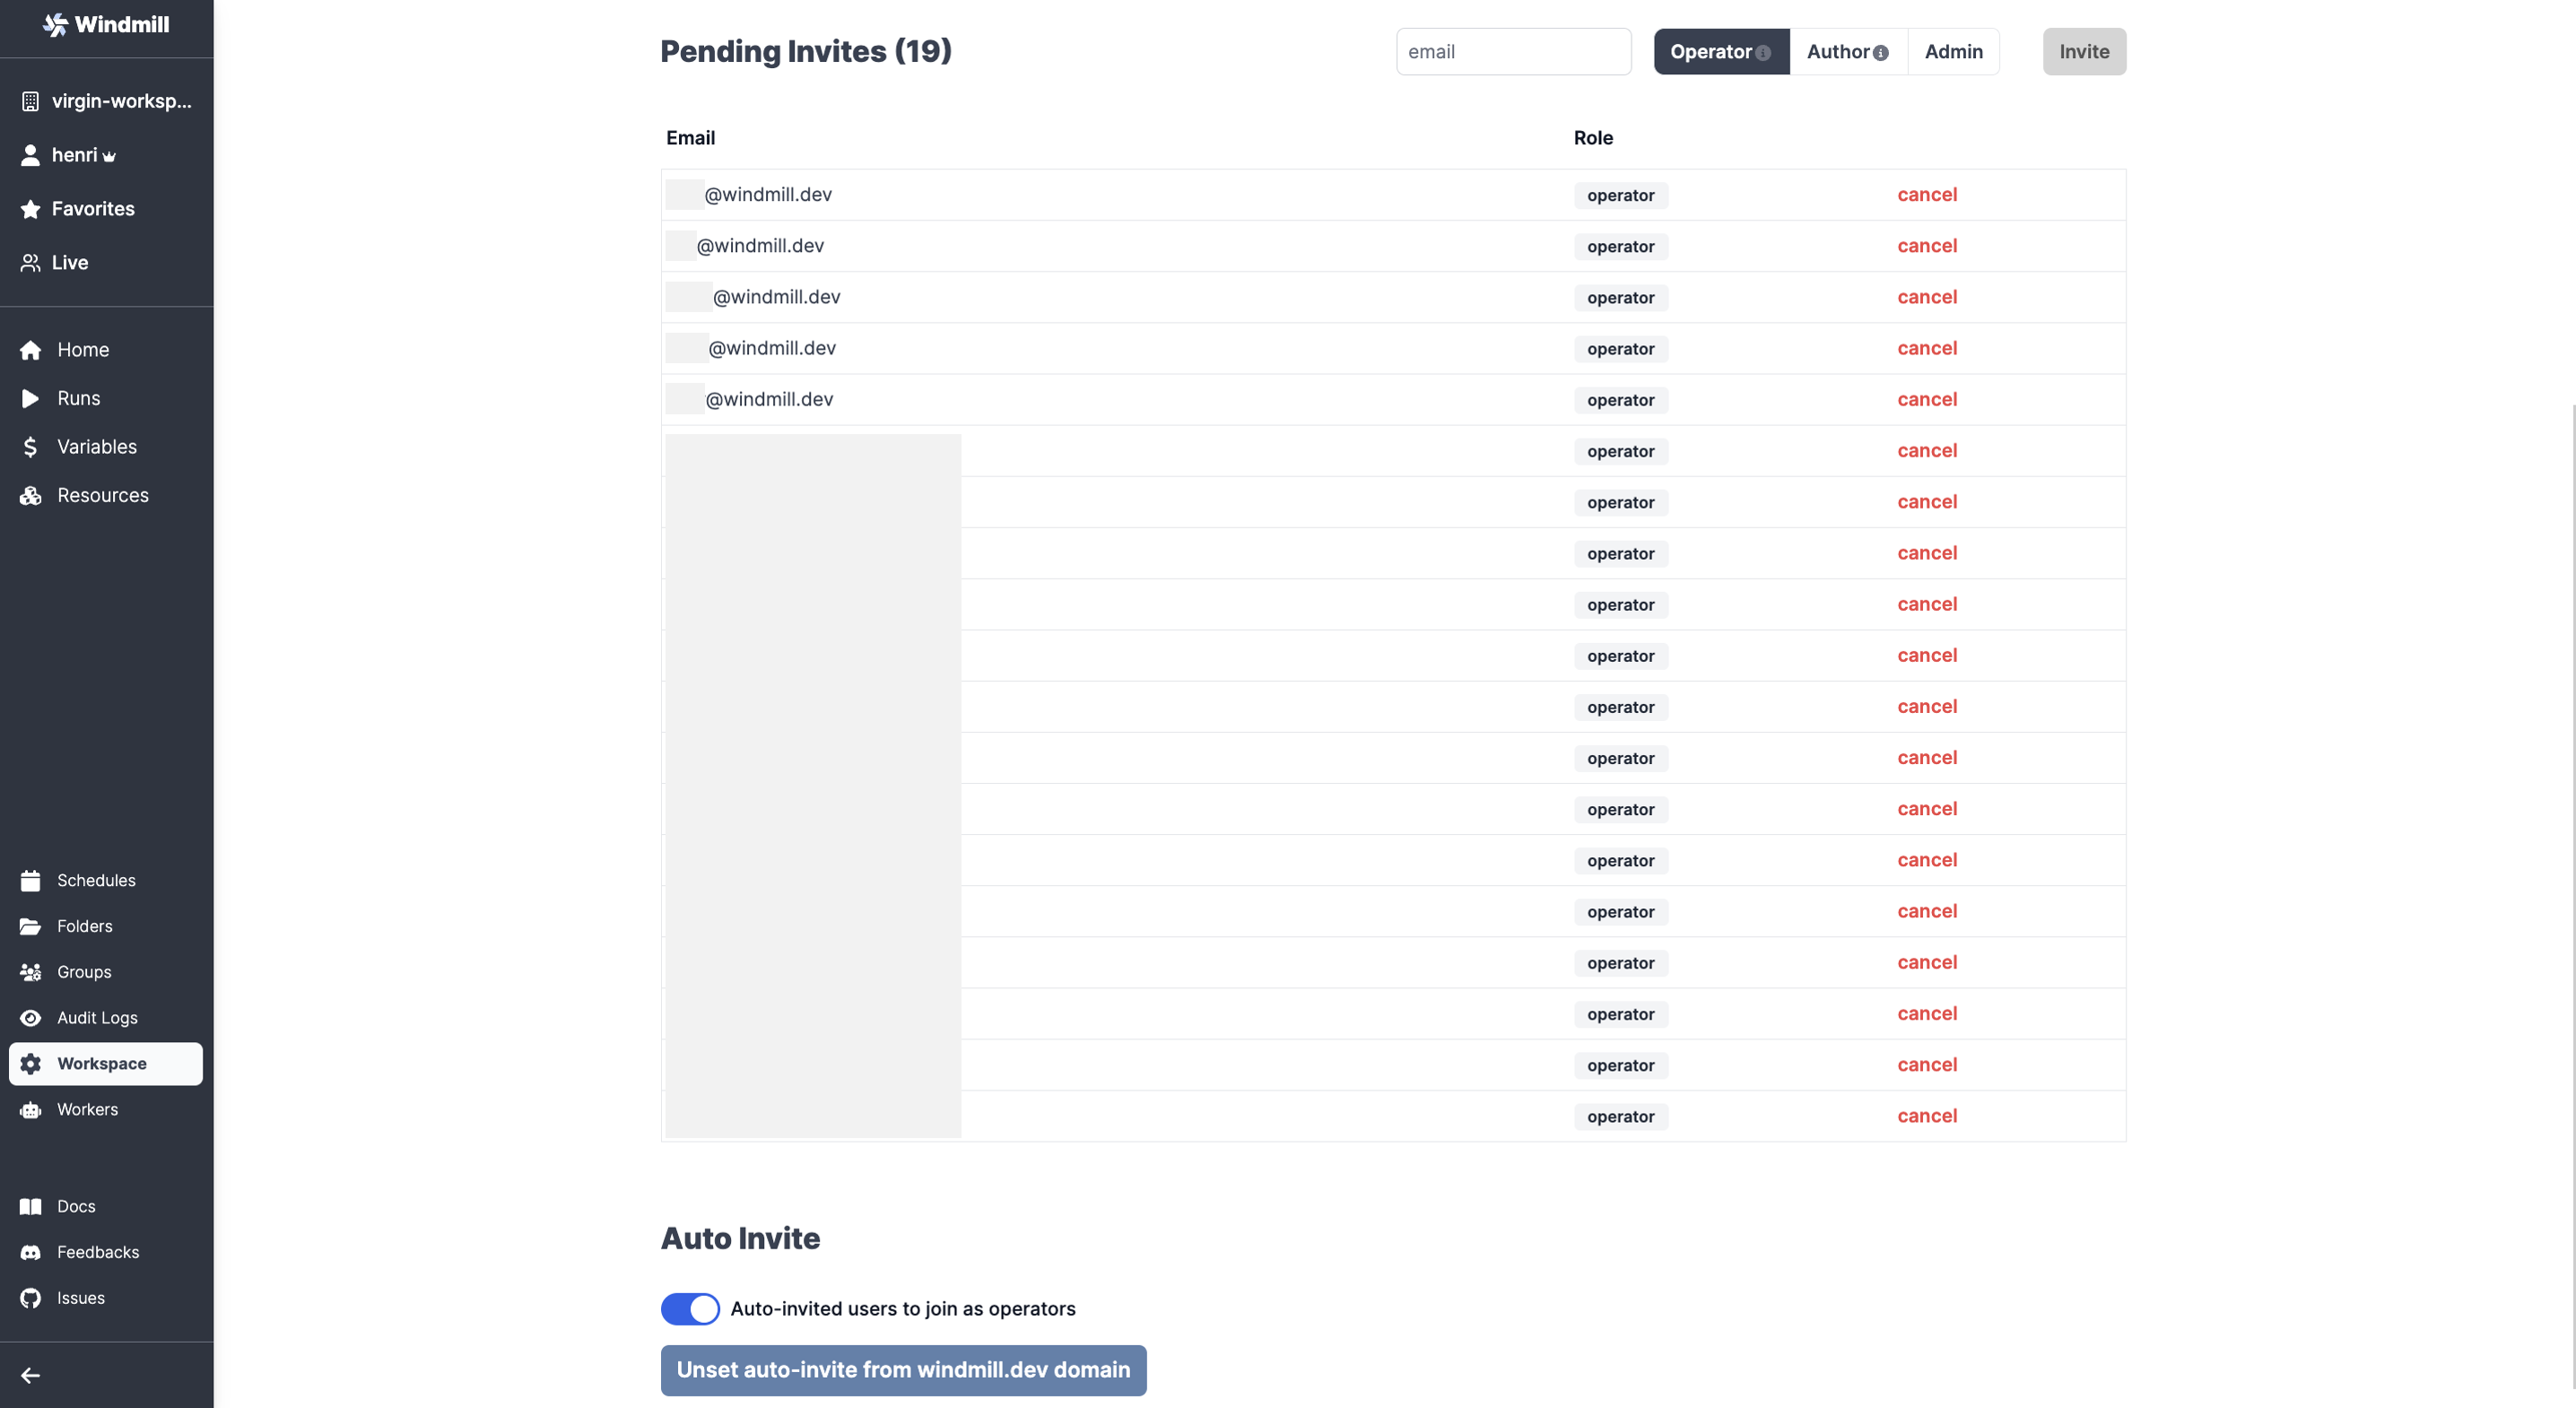
Once access is created to a Windmill account, an invite will be available in the "Invites to join a Workspace" section.

From where each user can set their username.

SCIM/SAML
Windmill supports SCIM and SAML for user provisioning and authentication.